Tutorial
Installation
This chapter covers the physical setup of the device — where to put it, what to plug into it, and the exact steps to bring it online.
Choosing a Location
Place the device on a flat, stable surface or mount it on a wall using the included bracket. Leave at least 10 cm of clearance on all sides for airflow, and keep it away from other electronics, metal cabinets, and thick walls that can weaken the wireless signal.
Physical Connections at a Glance
The rear panel (see the Technical Specifications figure) has four kinds of connectors you'll use during installation:
- WAN — connects to your internet source (ONT, modem)
- LAN 1–4 — connect wired devices to your local network
- USB — for a shared external drive or printer
- Power — the included 12 V / 1 A adapter only
Installation Steps
Numbered step-by-step instructions are the backbone of any installation section — this uses the .steps pattern (a plain <ol> styled with numbered circles via CSS counters, no JS involved).
- Choose a flat, ventilated surface or the included wall-mount bracket, away from direct sunlight and other heat sources.
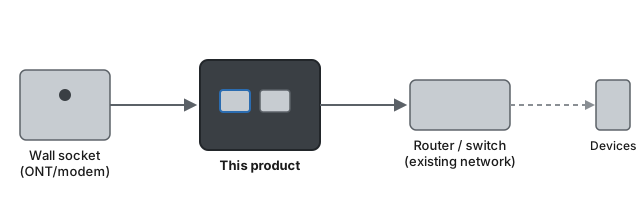
- Connect an Ethernet cable from the wall socket (ONT/modem) to the device's WAN port.
- Connect the device to your router or switch using a second Ethernet cable.
- Connect the power adapter and wait for the status LED to turn solid green (roughly 60 seconds).
- Continue to Initial Setup for configuration.